October 2011:
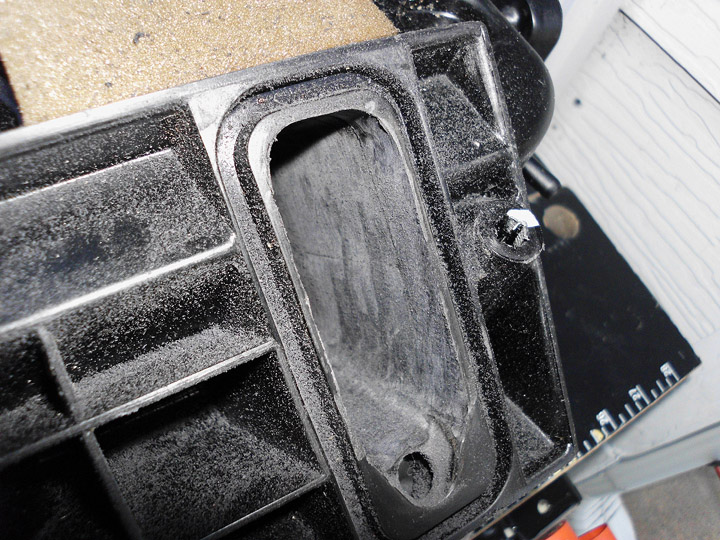
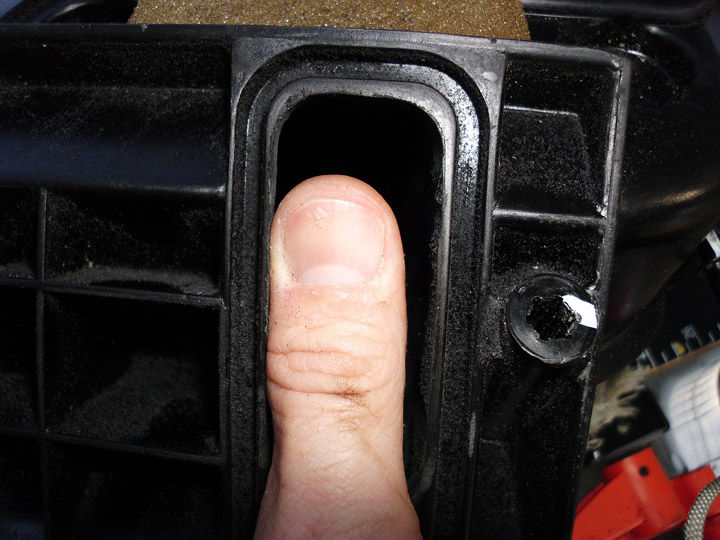
I bought a spare LS2 intake manifold which I ported myself. This supposed to free up some easily available horsepower. I got the work all done, had Lew check the logs and the tune is still adequate. Below are a few photos of the porting work I did.
Before any porting:
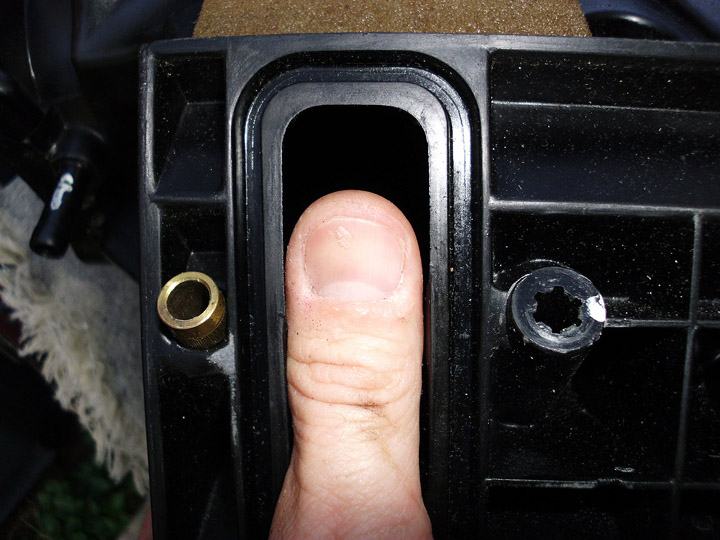
After the porting was complete:
November 2011:
I installed Lamin-X headlight and fog light covers. The headlight covers are clear and the fog light covers are yellow. If I don't like the yellow, I'll peel them off and install a set of clear covers I also bought. These photos aren't the best but I'll get better ones up in the Spring when the GTO hits the streets again.
Lights
off: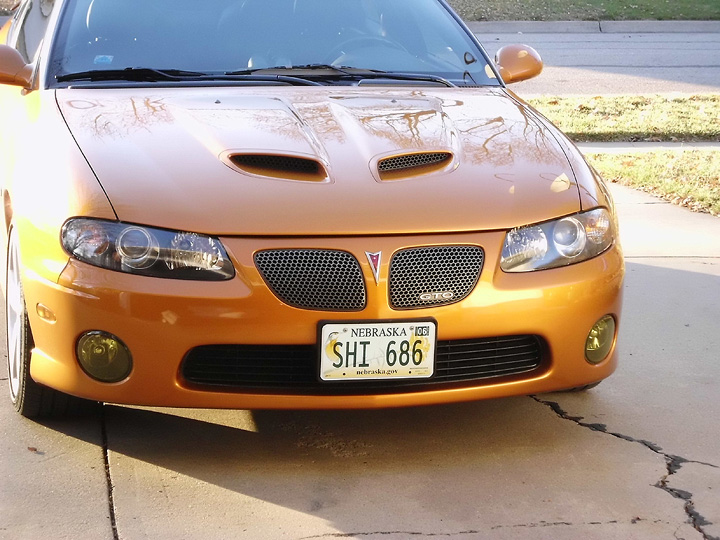
Lights on with fog lights on as well:
============================
January 2021:
I replaced the yellow covered fog lights with brand new NOS clear fog lights.
============================
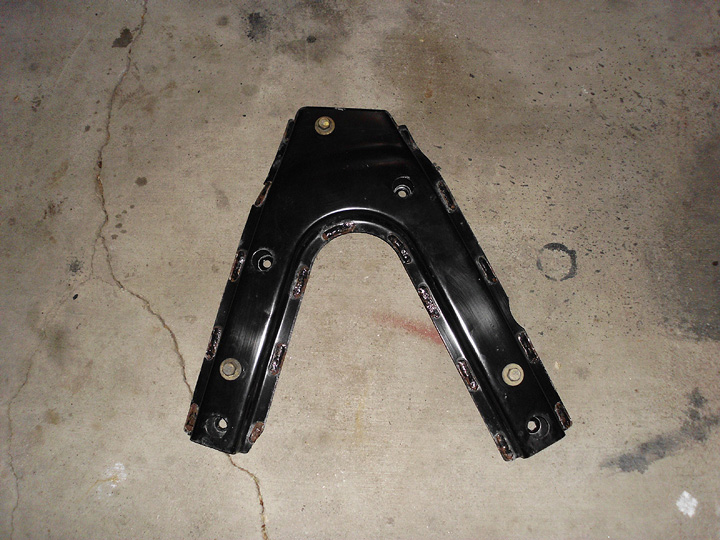
I also did a little weight reduction by removing the rear tow brace from under the trunk floor. The rear belly pan was reinstalled by using a set of homemade spacers with new bolts since the belly pan partially bolted to the brace when it was installed. Here is the unneeded 15 pounds of brace that was removed.
December 2011/January 2012
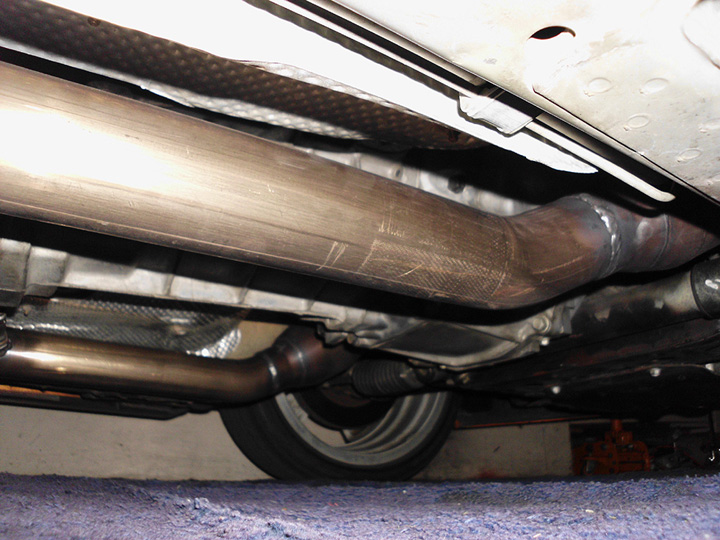
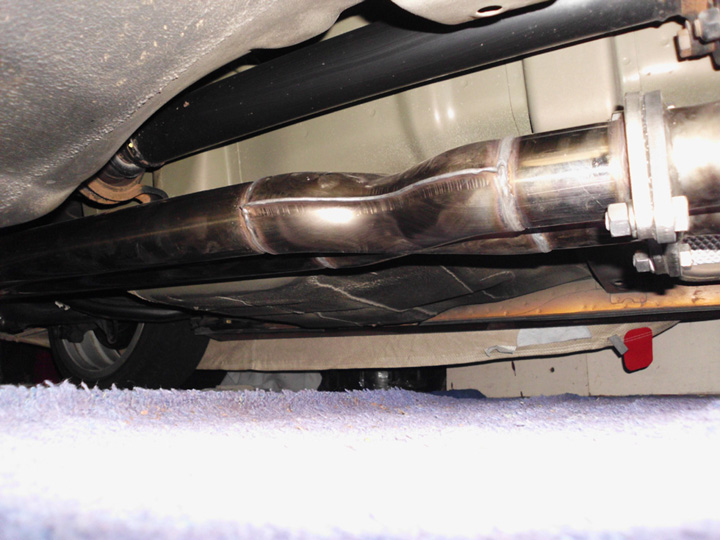
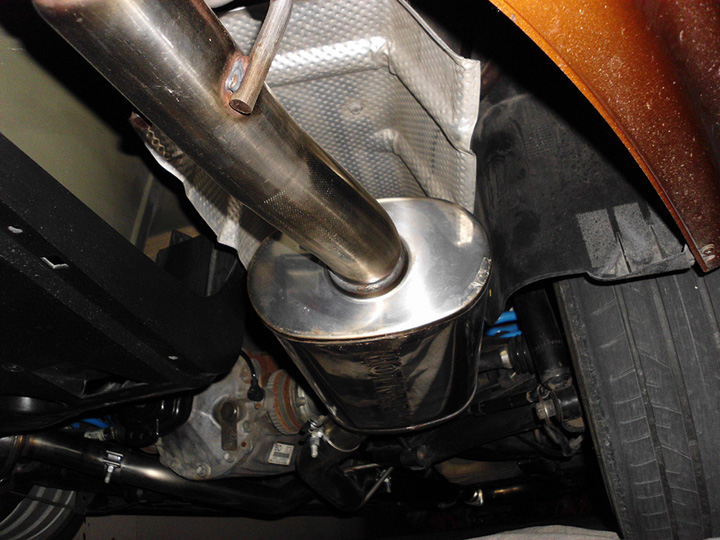
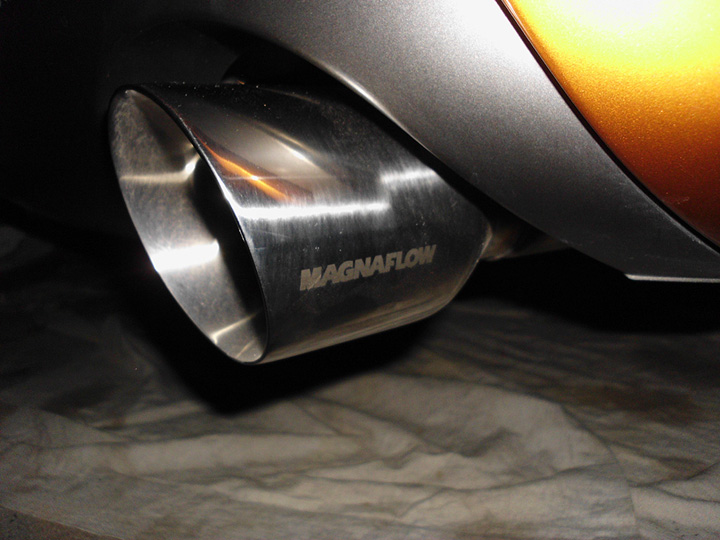
The new exhaust arrived! I went with JBA shorty headers, JBA catted mids and a Magnaflow catback. Everything is stainless steel.
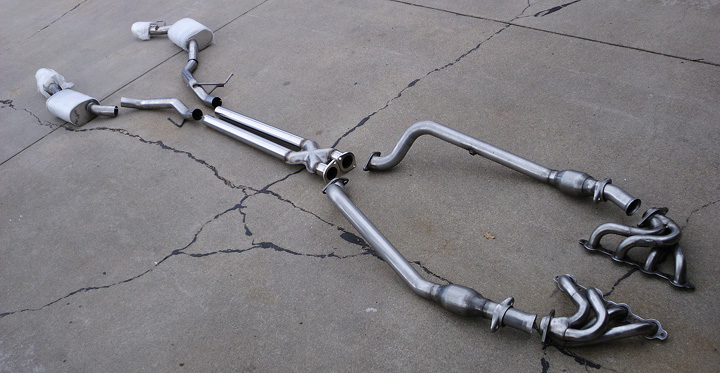
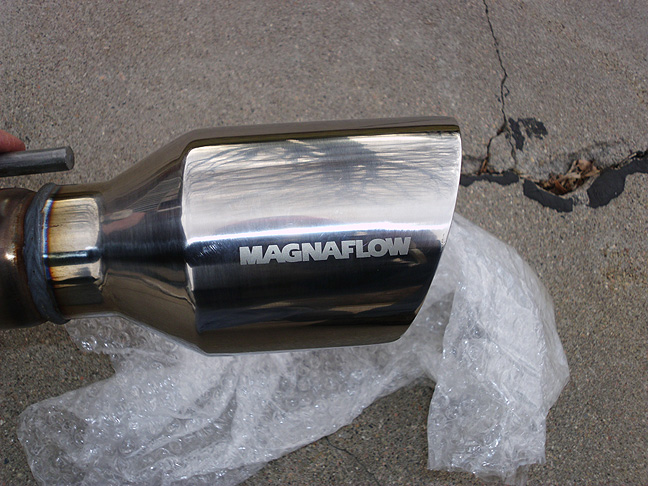
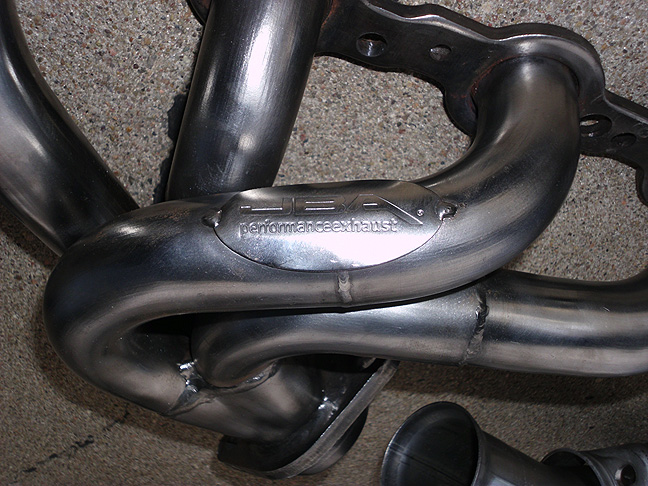
Here are some photos of the new exhaust pieces installed. The sections of the Magnaflow cat back the curves around and under the differential and axle do not appear to hang excessively low as some have said it did for them. Overall, I am very pleased with everything I've installed and with the improvement is performance and sound.
You can see short videos for the stock and aftermarket exhaust systems on my car on YouTube.
Stock: http://www.youtube.com/watch?v=1zAFoOVYK2s
Aftermarket: http://www.youtube.com/watch?v=twkVNj1oklk
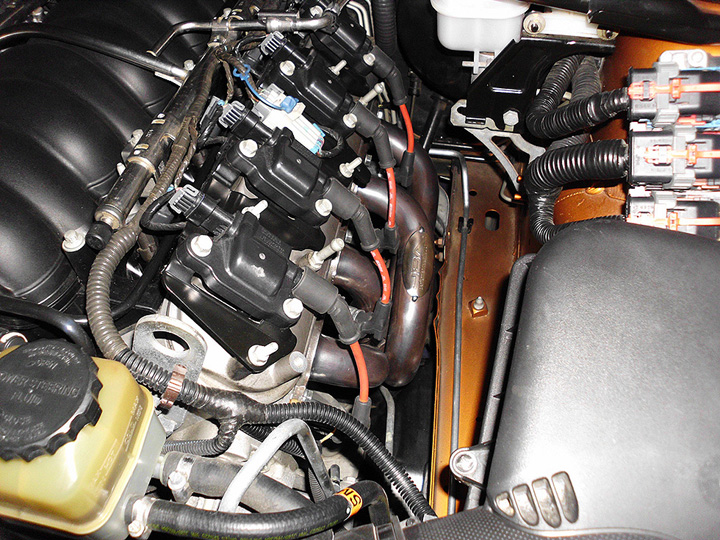
I also installed a ported LS2 throttle body. I found one that was already ported by a professional so it was a quick swap to install.
March 2012/April 2012
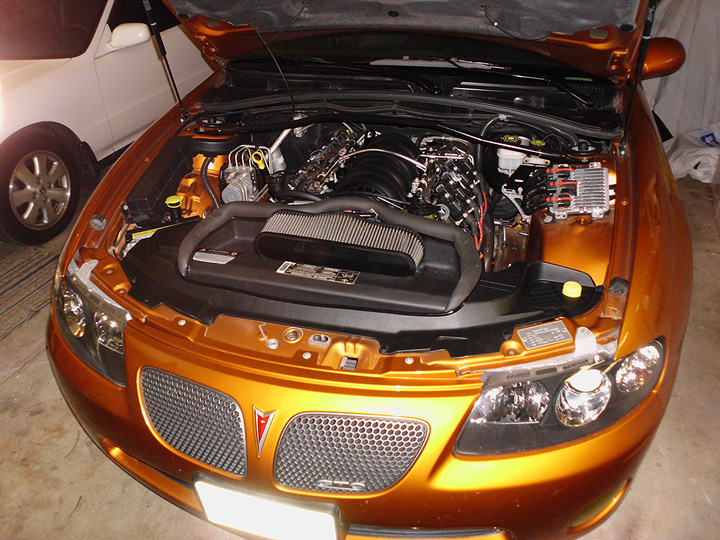
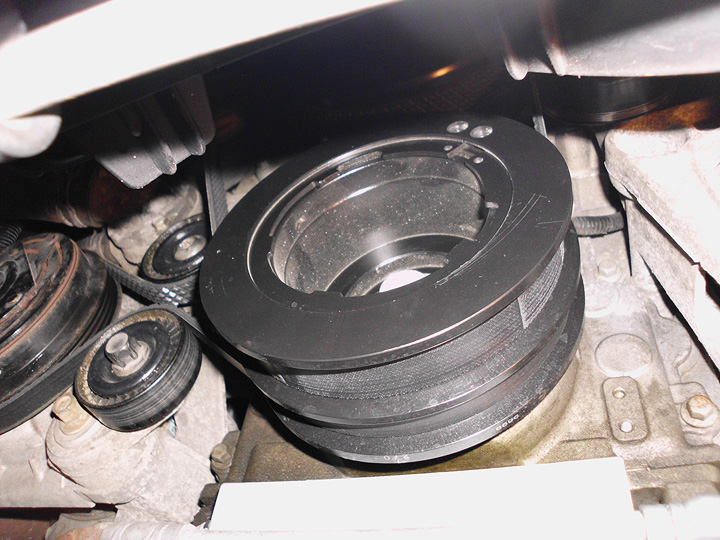
I got a little bonus at work so I bought a few more items. I bought a Vararam over the radiator cold air intake system, a BMR aluminum skid plate and an SLP 25% underdrive harmonic balancer pulley. While I was doing the work to install these items the battery gave up the ghost so after I cleaned up the mess it made I also installed a new AC Delco battery.
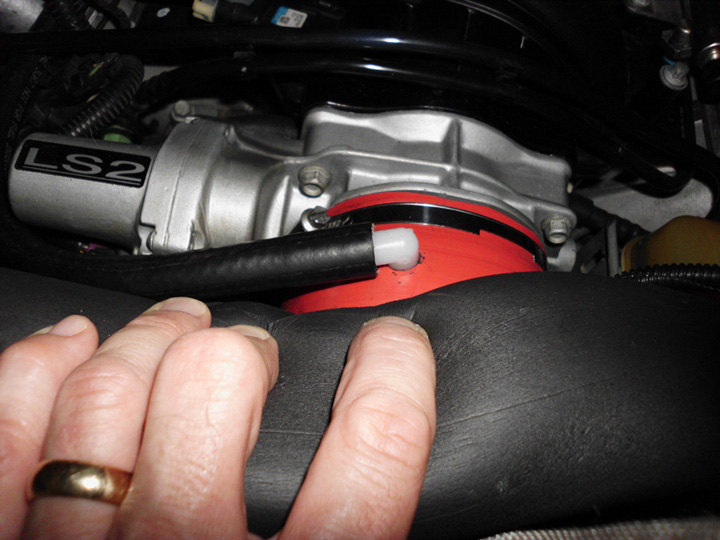
The Vararm as installed is shown below. I plan to replace the large red intake hose with one that does not have a PCV outlet and to attach the PCV instead to the backside of the air filter assembly but other than that the install is complete. If I had it to do over again, I'd probably not trim so much off the front of the radiator top cover. I bought a spare radiator top cover and a spare fan shroud which both need to be trimmed to fit the Vararam pan, so my originals are stored away in a safe place.
I also insulated the Vararam tray with Reflectix insulation and added a larger, softer seal to seal the tray to the hood when the hood is closed. I've had the hood scoop inserts cut open already for some time so the scoops help feed fresh, cool air directly to the intake.
I ran a log with the Predator and intake temperatures are remaining solid at a few degrees above ambient temperatures. Even after a 30 mile trip the intake tray is still cool to the touch.
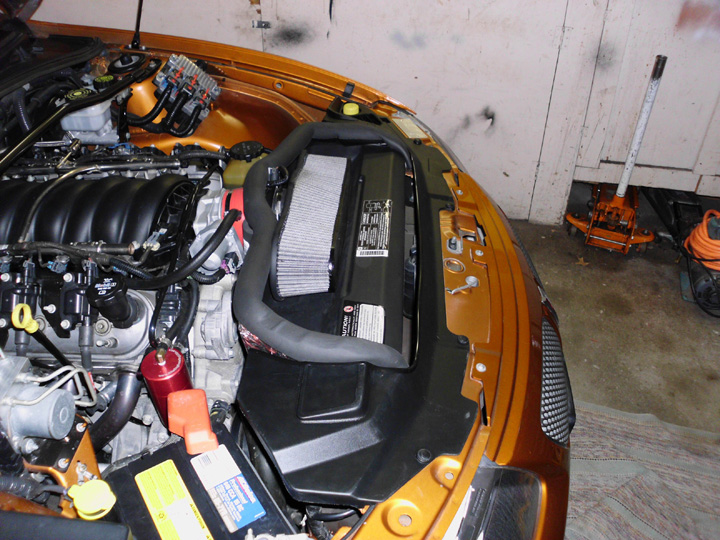
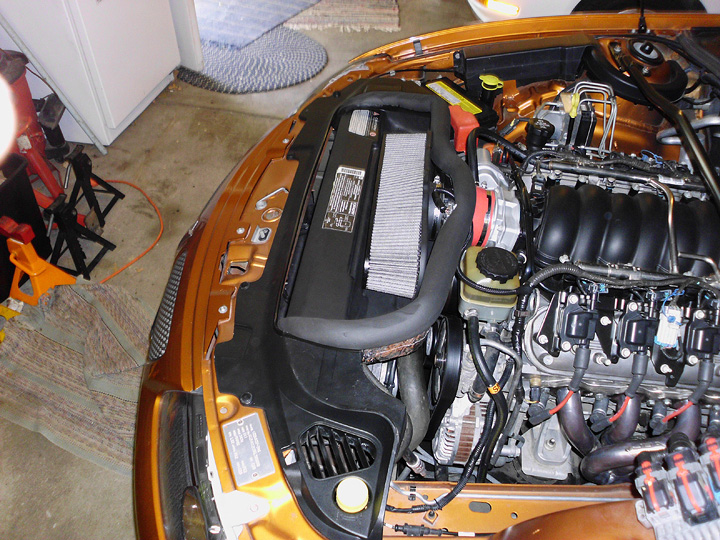
I made one small improvement to the Vararam. I installed a 90 degree fitting on the PCV hose connection so the hose doesn't stick up so prominently and the PCV hose installation looks more integrated into the package.
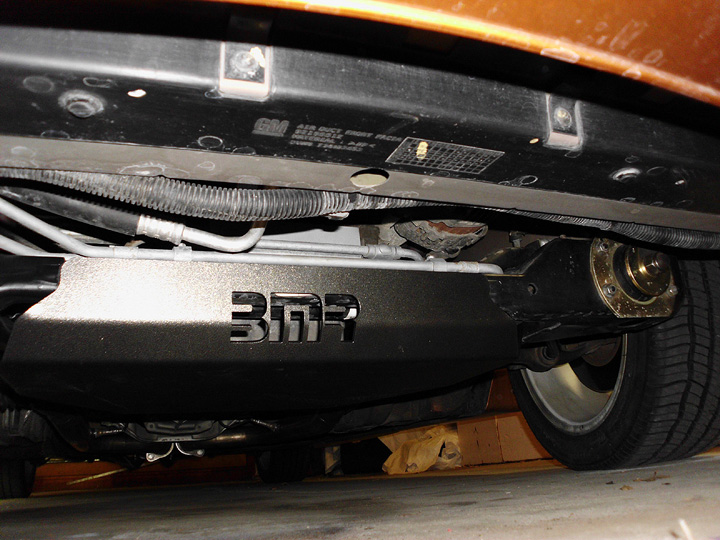
And the BMR skid plate. This one saves about 10 pounds versus the stock steel original one.
I didn't get a photo of the SLP underdrive pulley before I installed it but I got a photo of it installed when I was doing the front sway bar install.
June 2012
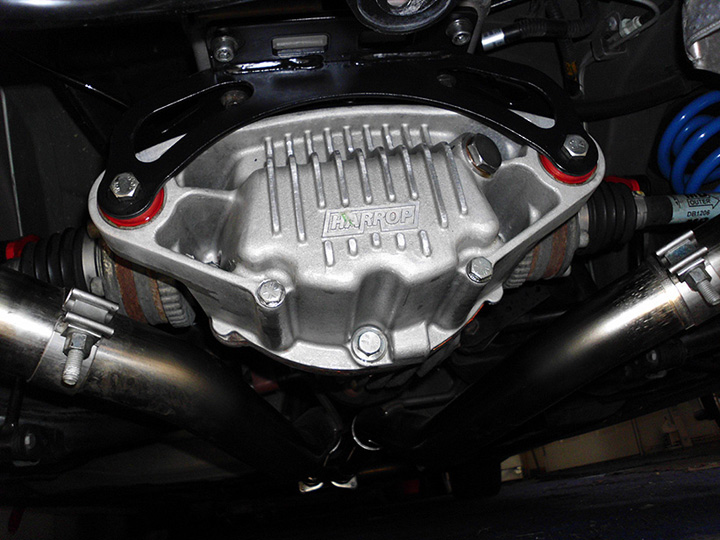
I'm now turning back to the suspension. I snagged an amazing bargain on a pair of Pedder's adjustable sway bars so I got the pair along with a pair of heavy duty front end links. I've had a Harrop Sports Differential Cover lying around for a few weeks too. I plan to visit a friend who has a lift soon so we can do the front sway bar, but I had some time recently so I installed the rear sway bar and the Harrop. Other than needing to adjust the speed sensors a second time, everything went well. The sensors were unbelievably stuck in the stock cover but I managed to get them out in the end.
I entirely failed to get a photo of the new rear sway bar, but here is a photo of the Harrop cover installed.
June 2012 (later in the month)
With the help of a good friend who has a lift, I installed the new Pedder's adjustable front sway bar. What a ridiculously difficult task this was! But it is in, the front cradle is aligned and I also installed new Pedder's end links.
Here is the old and new bars being compared. The stock end links were only ever used with a stock sway bar and both were bent, I can't believe how weak they were.
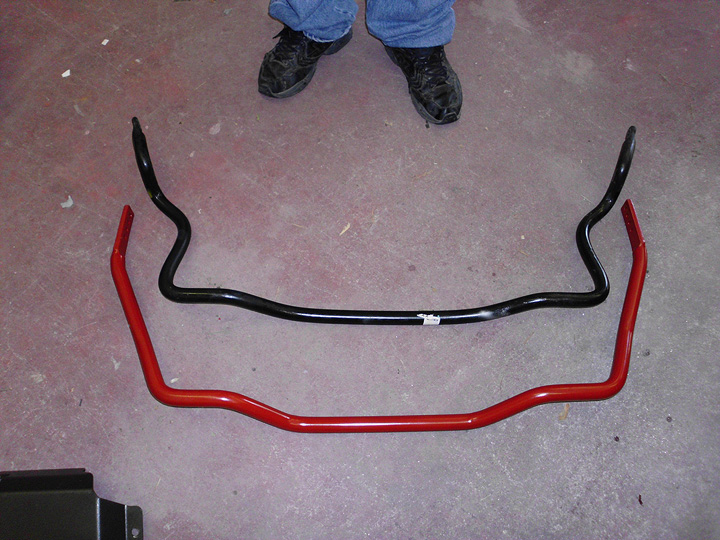
For comparison purposes the stock bars are 28mm in diameter on the front and 16mm in the rear. The Pedders bars I installed are 30mm in the front and 19mm in the rear.